
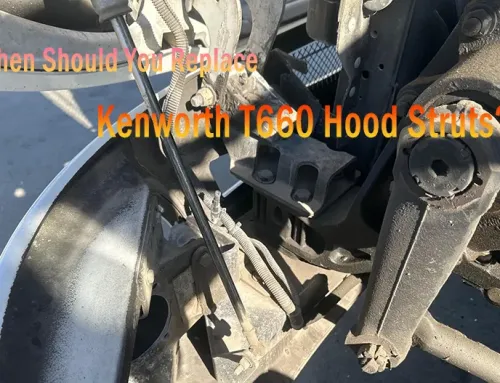
A hood that won’t stay open is more than just inconvenient — it’s a serious safety hazard. If your hood suddenly drops, feels unusually heavy to lift, or no longer holds its position, your hood shocks are likely failing.
Many vehicle owners begin searching for solutions like how to change hood shocks, while others use terms such as how to change hood struts, changing hood struts, or simply change hood struts. Regardless of the wording, the objective is the same: restore safe and reliable hood support quickly and correctly.
This guide will walk you through everything you need to know — from identifying the problem to completing a safe DIY replacement and choosing the correct gas struts for your vehicle.
What are Hood Struts?
Hood struts (also called hood lift supports or gas struts) are components installed on a vehicle’s hood that support and hold the hood open, making it easier and safer to access the engine compartment. Inside, they feature a sealed cylinder with compressed gas (usually nitrogen), a piston rod, and internal oil for damping, which together provide smooth, controlled support when lifting and holding the hood.

Why Your Hood Won’t Stay Open
Before starting the changing hood struts process, it’s important to confirm that the hood shocks are indeed the source of the issue. Common causes of failure include:
- Loss of internal gas pressure
- Seal wear and leakage
- Temperature-related performance decline
- Long-term fatigue from repeated use
When any of these occur, the struts can no longer generate sufficient force to support the hood safely.
Signs Your Hood Struts Are Failing
Recognizing the symptoms early can help prevent accidents and unnecessary strain. Look for the following warning signs:
- The hood will not stay open on its own
- The hood drops suddenly without warning
- Opening the hood requires more effort than usual
- Visible oil residue or leakage on the strut body
- Uneven lifting, where one side feels weaker
If you notice any of these issues, replacing the hood shocks is strongly recommended.
GASTAC OEM Hood Struts Size Chart
GASTAC offers a comprehensive range of hood strut sizes engineered to meet diverse vehicle requirements. Each specification is developed based on OEM structural standards, ensuring precise fitment, stable lifting force, and long-term reliability across different hood designs. Based on strong market demand and proven application performance, the following OEM hood strut sizes are among our most widely used and best-selling models:
Should You Replace One or Both Hood Struts?
This is one of the most common questions during the decision-making process. Even if only one strut appears to be failing, hood shocks function as a pair. Replacing just one side can result in uneven force distribution, reduced performance, and premature wear. Best practice:
- Always replace both hood struts at the same time
- Ensure balanced lifting and consistent support
- Improve overall lifespan and reliability
Tools and Safety Preparation
The process to change hood struts is relatively simple and can usually be completed as a DIY task with only basic tools. Basic tools and preparation:
- Flathead screwdriver
- Protective gloves
Ratchet and sockets
- A prop rod or assistant to support the hood
⚠️ Important safety note: Always secure the hood in an open position before removing the struts. A falling hood can cause serious injury.
How to Change Hood Shocks (Step-by-Step)
If you are learning how to change hood struts for the first time, the process is straightforward and can usually be completed in under 10 minutes.
Step 1: Open the hood and securely support it using a prop such as a wooden stick or pipe. Alternatively, you can ask a second person to hold the hood in place for added safety.
 (1)")
Step 2: Remove the hood strut retaining clips. Use a flathead screwdriver to carefully release the clips securing the hood strut.
 (2)")
Step 3: Loosen and remove the mounting fasteners. Use a ratchet and the appropriate socket size to unbolt the hardware connecting the strut to the vehicle body.
 (3)")
Step 4: Detach the hood strut. Gently pull the strut off the ball joint and remove it from the vehicle.
 (4)")
Step 5: Install the new strut. Position the new hood strut and loosely install the mounting hardware without fully tightening it at this stage.
 (5)")
Step 6: Attach the strut to the ball joint. Align the hood strut with the ball joint and press firmly until it securely snaps into place.
 (6)")
Step 7: Tighten all fasteners. Fully tighten the mounting hardware until it is secure and properly seated.
 (7)")
Your hood strut replacement is now complete. Please check the installation to ensure the hood opens smoothly, stays securely in place, and all mounting points are firmly locked without any looseness or abnormal movement.
If you prefer professional assistance, GASTAC professional team can provide expert hood strut replacement services.
Watch Installation Video Before You Start
While written instructions are helpful, many users prefer to visually confirm the process. Watching a short installation video can provide additional confidence and clarity before starting the replacement.
Common Installation Mistakes to Avoid
Even though the process is simple, certain mistakes can affect safety and performance:
- Failing to support the hood during removal
- Installing the strut in the wrong orientation
- Replacing only one side
- Using incorrect force specifications
Wrong vs Correct Installation Hood Struts
Understanding the difference between proper and improper installation can significantly impact performance.
❌ Incorrect Installation
- Installed upside down
- Only one strut replaced
- Mismatched force rating
✅ Correct Installation
- Proper orientation maintained
- Both struts replaced together
- Correct specifications used
Proper installation ensures smooth operation, safety, and long-term durability.
How to Choose the Right Hood Struts?
Beyond installation, selecting the right replacement product is essential. Key factors to consider include:
- Vehicle compatibility
- Force rating (N value)
- Extended and compressed length
- End fitting type (ball socket, eyelet, etc.)
Choosing the correct specifications ensures optimal performance and prevents future issues.
Vehicle Brands Compatibility Table
To help users quickly identify the correct replacement, the table below lists supported vehicle brands and models. Each row is optimized for search visibility, helping users find matches.
Why Choose GASTAC Gas Springs?
Choosing the right gas springs manufacturer is just as important as choosing the right product. GASTAC offers:
- Stable and consistent force output
- Long service life under repeated use
- OEM-level replacement performance
- Support for bulk orders and custom applications
Get a Quote for GASTAC Gas Springs
If you are looking for OEM-quality hood struts with reliable performance and stable supply, contact GASTAC to get a quotation today. Our team can support custom specifications, bulk orders, and fast global delivery based on your project needs.
Stay in the loop


