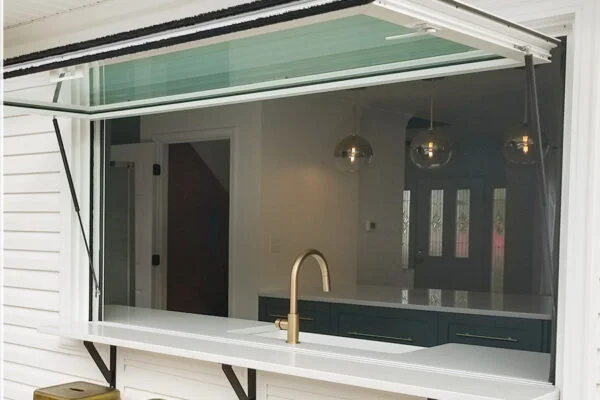
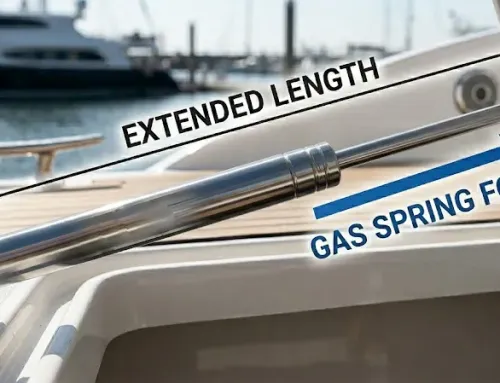
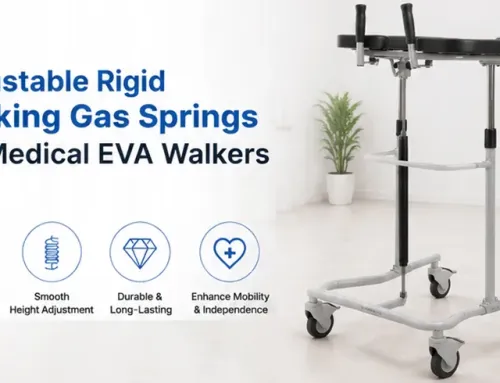
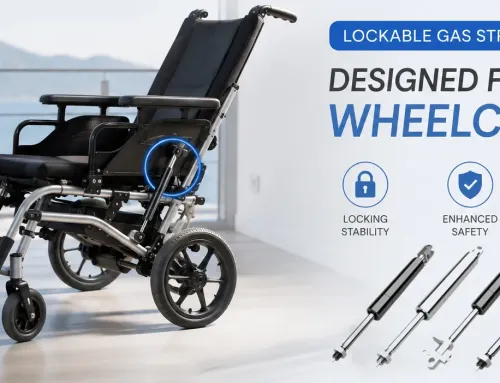
When you search how to remove gas struts, you’re not just looking for theory — you’re dealing with a real problem. At GASTAC, we work directly with automotive gas spring systems every day. Most of our customers come to us when:
- trunk or boot won’t stay open
- gas strut has lost pressure
- lifting becomes unstable or unsafe
In these situations, the first step is always the same: safe removal before replacement. This guide is based on our manufacturing and application experience, helping you remove gas struts correctly and prepare for a reliable upgrade.

What GASTAC Know About Gas Struts
As a gas spring manufacturer, we design struts to deliver:
- precise lifting force
- controlled motion
- long-term sealing performance
Most automotive applications — including those where users search how to remove trunk struts or how to remove boot struts — use a standardized:
👉 ball joint + retaining clip system
This design is intentional:
- fast installation
- tool-minimal removal
- safe locking under pressure
Before Removing: What We Always Recommend
Before explaining how to remove a gas strut, we need to be very clear: A gas strut is a pressurized component — but the real risk comes from the supported load, not the strut itself. From our engineering experience, always:
- Support the trunk / boot / hood securely
- Never rely on one remaining strut
- Avoid removing both struts at the same time
This is the difference between a controlled removal and a dangerous one.
How to Remove Gas Struts
This is the standardized removal procedure recommended by GASTAC for most automotive and industrial gas strut applications. It reflects best practices developed through extensive engineering experience, ensuring safe handling, preventing component damage, and maintaining system integrity during replacement or maintenance.
Step 1 – Secure the Structure
Before starting, stabilize the trunk, boot, or hood. From our field feedback, this is the most overlooked step when users search how to remove gas struts, yet it is the most critical.
Step 2 – Identify the Connection
GASTAC gas struts (and most OEM designs) use:
- gas spring ball stud mounting points
- gas strut socket ends
- gas spring steel retaining clips
This allows non-destructive removal.
Step 3 – Release the Clip (Key Step)
Use a flat screwdriver to:
- Gently lift or pry the retaining clip outward by a few millimeters
- Do NOT fully remove the clip from the socket
- Only release enough tension to disengage the internal locking groove
We design this clip to be reusable — forcing it out completely can damage the connection.
Step 4 – Detach the Gas Strut
Once the clip tension is released:
- Firmly pull the socket away from the ball stud
- The joint should disengage smoothly without excessive force
- Repeat the same process on the opposite end
After both ends are disconnected, the gas strut can be safely removed from the application.
Applicable Across All Common Use Cases
This standardized GASTAC method applies universally, whether users are searching for:
- how to remove a gas strut
- how to remove trunk struts
- how to remove hood struts
- how to remove boot struts
The internal connection mechanism remains consistent across these applications, which is why following a correct, non-destructive removal process is essential for both safety and component longevity.
What We See Customers Do Wrong
Based on years of feedback, here are the most common mistakes:
- Removing without supporting the load
- Using excessive force instead of releasing the clip
- Removing the clip entirely
- Trying to compress or “depressurize” the strut
👉 Important: gas struts are sealed units — they are not designed to be disassembled or depressurized manually.
After Removal: This Is Where Most Projects Go
From our customer data, over 80% of users searching how to remove gas struts are actually preparing for replacement. Typical reasons include:
- Loss of lifting force – the structure no longer stays open or requires manual support
- Oil leakage – visible fluid around the rod or seal area, indicating internal seal failure
- Inconsistent or jerky motion – uneven operation, sticking, or sudden drops during movement
- Aging components – natural wear over time leading to reduced pressure stability and reliability
These signs indicate that the gas strut is no longer performing within its designed parameters, making replacement the correct and necessary solution, rather than reinstallation or temporary adjustment.
Replace with Confidence – GASTAC Gas Struts
Once removal is complete, the next step is choosing the right replacement. At GASTAC, we manufacture gas struts that are engineered for:
- Exact Force Matching: We match OEM force specifications to ensure proper lifting behavior.
- Smooth Operation: No sudden drop, no instability.
- Long Service Life: Advanced sealing technology prevents gas loss over time.
- Direct Installation: Same interface design — simply press onto the ball joint.
- Cost-Effective Supply: OEM-level performance without OEM pricing.
Installation Gas Strut Is Even Easier
Once you understand how to remove a gas strut, installation becomes straightforward and intuitive. It mainly involves simple alignment and light pressure—no tools or complex steps required.This is why gas struts are widely regarded as one of the easiest automotive components to replace.
Watch the installation process in the video below.
Final Words from GASTAC
Understanding how to remove gas struts is not just about removing a part — it’s about restoring safety, functionality, and user confidence. At GASTAC, we don’t just manufacture gas springs — we design solutions that make installation, removal, and long-term use simple and reliable.
张航
Stay in the loop


