Liftgate Struts
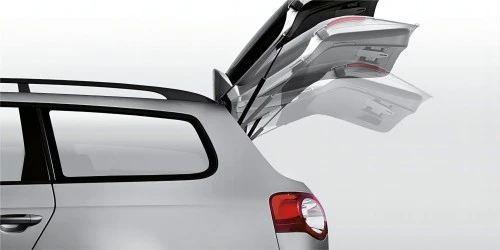
Is your SUV or hatchback liftgate feeling exceptionally heavy, dropping slowly, or slamming shut unexpectedly? A failing rear hatch support system is not just an inconvenience—it is a critical safety hazard. When factory liftgate struts lose internal pressure, the heavy structural weight of an SUV tailgate can drop without warning.
GASTAC premium aftermarket liftgate struts are engineered to restore the smooth, effortless, and hands-free opening performance your vehicle had when it rolled off the assembly line. Designed as direct-fit OEM equivalents, our liftgate supports eliminate fitment anxiety and provide heavy-duty reliability in all weather conditions.
What Are Liftgate Struts?
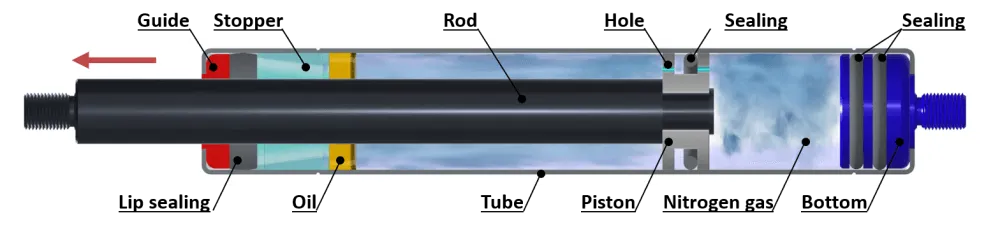
Liftgate struts (also known as rear hatch gas struts or tailgate lift supports) are gas-charged cylinders designed to support the weight of your vehicle’s rear door. They are engineered to:
- Hold the liftgate securely open
- Assist smooth opening and closing
- Reduce manual lifting effort
- Prevent sudden tailgate drop
- Maintain controlled movement in all conditions
Most modern SUVs and hatchbacks rely on these components instead of mechanical hinges or support rods.
Why Liftgate Struts Fail?
Liftgate struts degrade over time due to internal and external factors. The most common causes include:
- Natural loss of internal nitrogen gas pressure
- Wear and aging of internal sealing components
- Temperature fluctuations affecting gas stability
- Corrosion from moisture, road salt, and dust
- Long-term mechanical fatigue from frequent use
- Internal leakage or seal failure
Once pressure drops, the struts can no longer safely support the liftgate.
Common Signs of Worn Liftgate Struts
If your liftgate struts are failing, you may notice:
- Liftgate will not stay fully open
- Rear hatch slowly drops after opening
- Uneven support from left and right struts
- Tailgate feels unusually heavy
- Visible oil or gas leakage on the strut body
- Weak performance in cold weather
These symptoms indicate the struts are at the end of their service life.
Safety Risks of Failed Liftgate Struts
Worn liftgate struts are more than an inconvenience—they can create real safety risks:
- Sudden liftgate closure during loading
- Head or hand injury risk
- Damage to hinges or mounting points
- Difficulty accessing cargo area safely
Replacing worn struts immediately restores safe operation.
OEM Liftgate Struts Specification Sheet
| OEM | Photo | Rod / Tube Ø | Stroke | Extended Length | Force | Year |
|---|---|---|---|---|---|---|
95962016 |  | 8 / 18 mm | 145 mm | 375 mm | 590N | CHEVROLET SPARK 2005 – … |
99151255100 |  | 8 / 18 mm | 35 mm | 170 mm | 130N | PORSCHE 911 2013 – 2020 |
04894554AG | 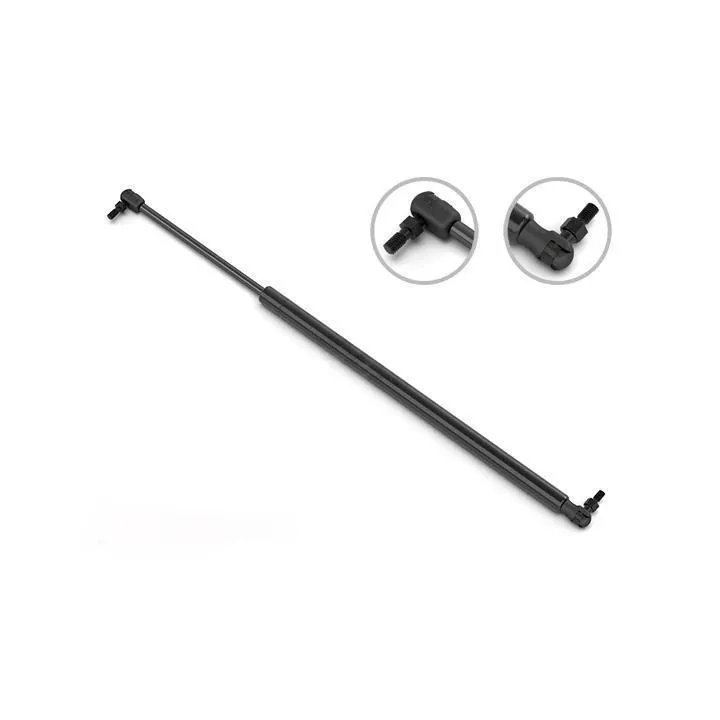 | 8 / 18 mm | 165 mm | 655 mm | 880N | CHRYSLER VOYAGER 2000 – 2008 |
51247211289 | 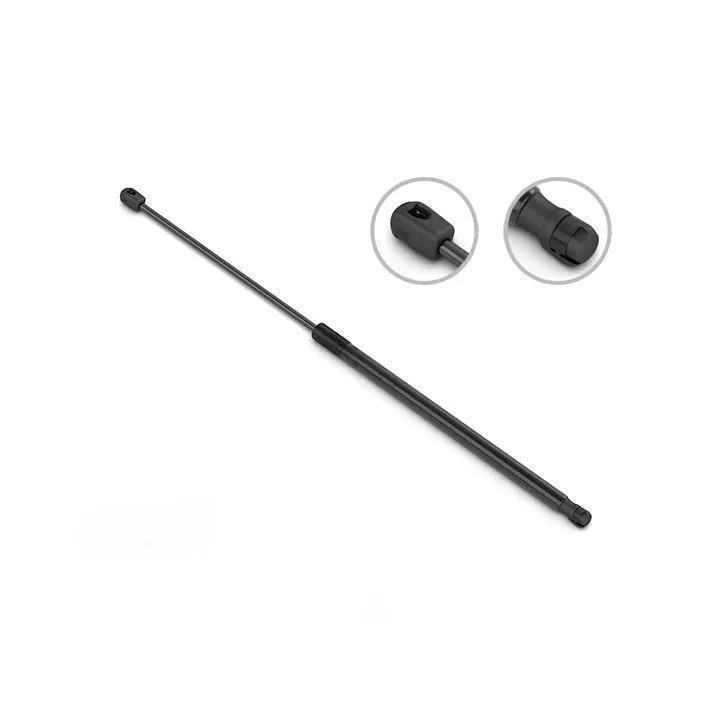 | 8 / 18 mm | 205 mm | 655 mm | 610N | BMW X3 2010 – 2017 |
68068261AA | 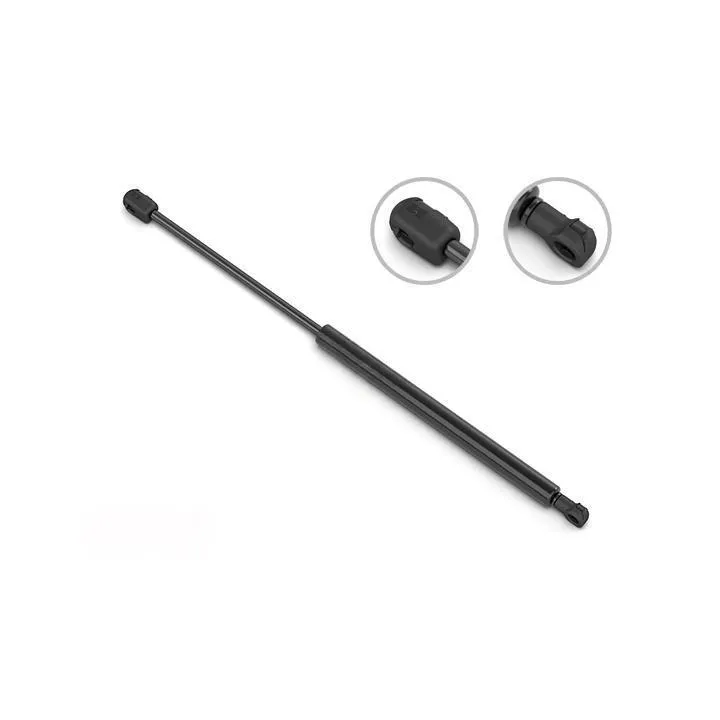 | 8 / 18 mm | 110 mm | 515 mm | 580N | LAND ROVER RANGE 2002-2012 |
Interior Technology
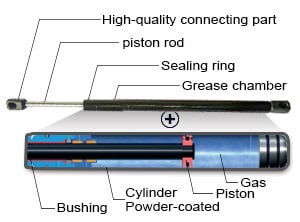
- Highest corrosion resistance achieved through powder coated cyclinders and special treated piston rod surfaces.
- Minimal friction for the production of lowest extension forces.
- Great life cycles.
- Protection against vibration and light side forces.
- Integrated grease chamber.
- Low break away forces.
- Installation and storage in any position.
Do You Need to Replace One or Both Struts?
Liftgate struts are typically installed in pairs, and both sides work together to balance the weight of the rear hatch. For best performance:
- Always replace both struts at the same time
- Avoid mixing old and new components
- Ensure balanced lifting force on both sides
This ensures smooth, stable, and long-lasting operation.
How to Choose the Right Liftgate Struts?
- Verify Year, Make, and Model: You must precisely match your vehicle’s specific production year, brand, and trim level to ensure the physical dimensions fit.
- Distinguish Manual vs. Power Liftgate: Ensure compatibility with your specific tailgate system, as incorrect pressure ratings will strain or damage automatic electric motors.
- Always Purchase and Replace in Pairs: You must change both sides simultaneously to prevent uneven lifting force, hinge warping, and premature strut failure.
- Cross-Reference Dimensions and Force: Check the extended length, stroke distance, and Newton (F1) force rating to guarantee the struts can support the heavy hatch weight in cold weather.
- Check the End-Fitting Design: Match the new socket configuration to your vehicle’s existing ball studs for a direct, tool-free snap-on installation.
Original OEM vs GASTAC Liftgate Struts
| Feature / Metric | Original OEM Trunk Lid Lift Supports | GASTAC Aftermarket Trunk Lid Lift Supports |
|---|---|---|
| Fitment & Dimensions | Factory-designed for exact OEM dimensions and mounting points. | Direct-fit replacement matching OEM length, stroke, and fittings. |
| Pressure Calibration | Calibrated to original factory lifting force specifications. | Stable nitrogen pressure for smooth lifting in all temperatures. |
| Seal & Rod Durability | Standard OEM sealing system with gradual wear over time. | Enhanced seals and polished rods reduce leakage and wear. |
| Cost & Value | Higher dealership pricing for OEM replacement parts. | More affordable with OEM-level performance and reliability. |
| Application Range | Limited to specific factory-supported vehicle models. | Available for a wide range of sedans, SUVs, hatchbacks, and coupes. |
How to Replace Liftgate Struts?
Replacing your SUV or hatchback liftgate struts is a quick and simple DIY process that requires no specialized garage equipment. Because a rear hatch carries massive structural weight, you must follow the proper safety and installation steps to ensure a secure setup. Here is the quick step-by-step guide to replacing your liftgate struts:
- Secure the Liftgate: Have an assistant hold the heavy SUV hatch fully open to prevent it from dropping rapidly and causing injury.
- Release the Clip: Insert a flat-head screwdriver under the metal retaining clip on the old strut’s ball joint and pry it up slightly to pull the strut off.
- Clean the Studs: Wipe away all old grease, road grit, and dirt from the mounting ball studs.
- Snap on the New Liftgate Strut: Align the new socket with the ball stud and push firmly inward until you hear a distinct “Click”.
- Always Replace in Pairs: Repeat the process on the opposite side to prevent uneven force distribution and premature strut failure.

Contact Us
Interested in our products, pricing, MOQ, or customized solutions? Fill out the form below to submit your inquiry or request a quote, and our team will get back to you within 24 hours.

