Introduction-replacing liftgate struts:
When liftgate struts wear out. Rather than shelling out money for a mechanic, learning to replacing liftgate struts yourself can save both time and expense. In this article, we’ll provide you with a comprehensive guide on how to replacing liftgate struts, empowering you to tackle this DIY automotive maintenance task with confidence.
Step 1: Gather Your Tools and Equipment
Before you begin changing liftgate struts, gather all the necessary tools and equipment:
Replacement liftgate struts (make sure they are compatible with your vehicle.If you haven’t found the perfect gas spring for your needs yet, visit our product page to explore our wide selection and find the right one for you.)
- Socket wrench set
- Flat head screwdriver
- Gloves
- Prop rod or support tool (if applicable)
Step 2: Locate and Remove the Old Struts
Open the liftgate and locate the liftgate struts on either side.
Support the liftgate with a prop rod or support tool to prevent it from falling when the struts are removed.Or ask a friend to support the liftgate.
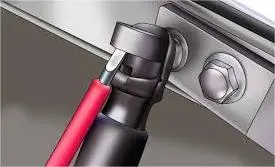
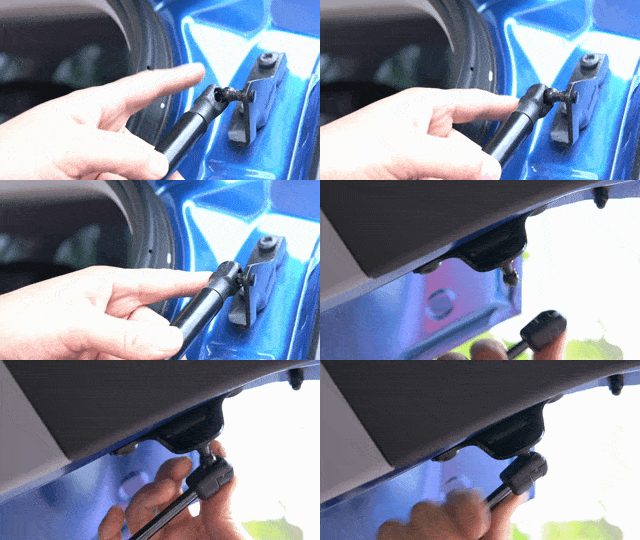
Use a screwdriver to detach the liftgate strut to the vehicle frame and liftgate.

Step 3: Install the New Struts
Position the new liftgate struts in place, aligning them with the mounting points on the vehicle frame and liftgate.Press the sockets onto the ball studs.
For optimal performance and longevity, always mount the gas spring with the rod facing downwards when in the fully closed position.

Step 4: Test the Liftgate
Once the new liftgate struts are installed, carefully remove the prop rod or support tool.
Test the liftgate to ensure it opens and closes smoothly without any issues.
If necessary, make any adjustments to the alignment of the struts to achieve optimal functionality.
Conclusion-replacing liftgate struts:
By following these simple steps, you can successfully replacing liftgate struts on your vehicle, saving both time and money. Remember to prioritize safety throughout the process and take your time to ensure the job is done correctly. With this newfound knowledge, you’ll be better equipped to tackle other DIY automotive maintenance tasks with confidence.
Should you require assistance or have any questions, feel free to reach out to our knowledgeable team for expert support.
